How to make your own compost at Home: A Step by Step Beginner’s Guide
 ">Discover Homesteading
Send an email
">Discover Homesteading
Send an email

How to Make Your Own Compost at Home: A Step by Step Beginner’s Guide
What is composting and why does it matter?
Composting is one of the simplest and most powerful ways to turn everyday waste into something valuable. At its core, composting is the natural process of breaking down organic materials such as food scraps, leaves, and grass clippings into a nutrient rich soil amendment. Instead of throwing away what you do not use, you recycle it into something that nourishes your garden.
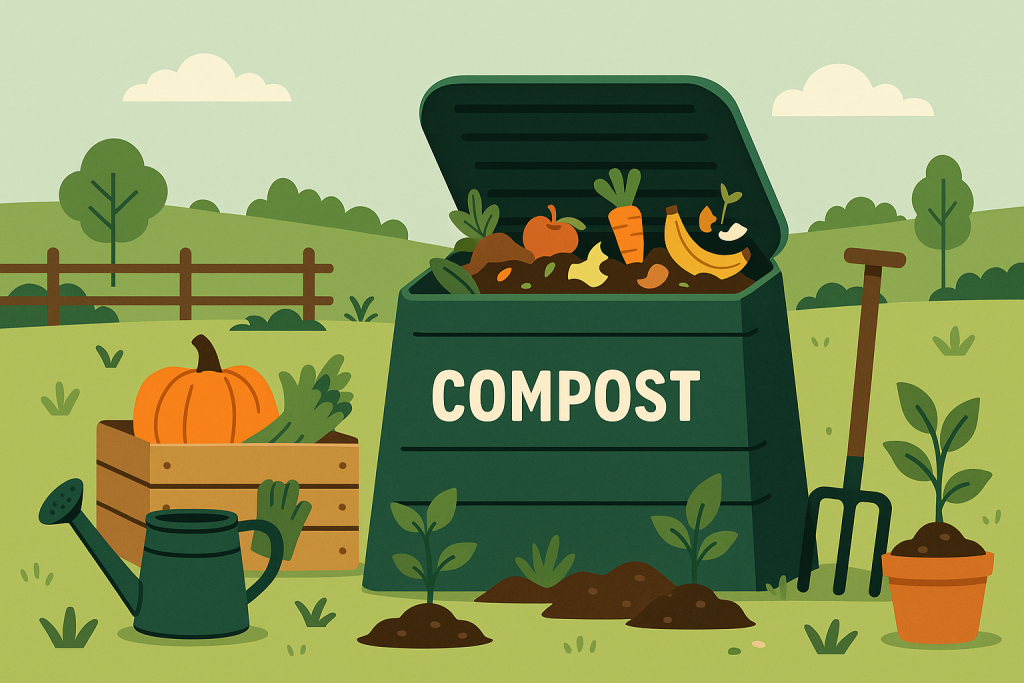
For beginners, composting may sound complicated, but nature has been doing it for millions of years. When leaves fall in the forest and decompose on the ground, they create a layer of fertile soil that supports new life. Making homemade compost at home is essentially copying this natural cycle in a controlled way.
Environmental benefits
One of the biggest reasons to start composting for beginners is the positive impact on the environment. In the United States, food waste makes up a large portion of what ends up in landfills. When food scraps are trapped in plastic bags without oxygen, they break down slowly and release methane, a greenhouse gas more powerful than carbon dioxide. By composting kitchen scraps and garden waste, you not only reduce landfill waste but also help cut greenhouse gas emissions.
Composting also reduces the need for chemical fertilizers. Instead of relying on store bought products, you create a free and organic fertilizer at home. This reduces pollution from fertilizer runoff and keeps your soil healthier in the long run.
Gardening benefits
Gardeners know the value of rich, fertile soil. Finished compost improves soil structure by helping sandy soils retain moisture and loosening heavy clay soils. It also adds essential nutrients like nitrogen, phosphorus, and potassium, which plants need to grow. Compost increases the soil’s ability to hold water, which means you spend less time and money on irrigation.
Another major benefit is how compost supports soil life. Worms, fungi, and beneficial bacteria thrive in compost enriched soil, creating a healthier ecosystem underground. This leads to stronger plants, higher yields, and gardens that are more resilient to pests and disease.
Why composting matters at home
Making your own compost at home is not only for large gardens. Even if you live in a small apartment, there are indoor composting methods that let you recycle food scraps without creating odors or pests. Whether you use a backyard compost bin, a simple open pile, or a compact indoor system, you are creating something valuable from what would otherwise be trash.
Composting also saves money. Store bought compost and fertilizers can be expensive, especially if you are gardening on a larger scale. By turning waste into compost yourself, you cut costs while producing something often better than what you can buy. Homemade compost is fresh, living, and filled with nutrients in a way that many commercial products cannot match.
A mindset shift
Learning how to make your own compost at home is also about shifting how you view waste. Instead of seeing banana peels, coffee grounds, or autumn leaves as garbage, you start to see them as resources. This change in perspective is at the heart of sustainable living. Every time you add scraps to your compost bin, you are participating in a cycle that reduces waste and enriches your soil.
For beginners, the process may seem overwhelming at first, but remember that composting is forgiving. Even if your pile is not perfect, nature will still do the work. By starting small and learning as you go, you can build confidence and create compost that improves your garden and reduces your household footprint.
Composting matters because it connects you directly to the cycles of nature. It transforms waste into growth, problems into solutions, and chores into habits that support both your household and the planet.
Choosing the right composting method
Once you understand what composting is and why it matters, the next step is choosing a method that fits your lifestyle. There is no single best way to compost. The right approach depends on the space you have, the type of waste you generate, and how much time you want to spend maintaining your pile or bin.
Backyard composting
For those with outdoor space, backyard composting is the most common method. It usually involves creating a compost pile or using a bin in the corner of your yard. The size of your system depends on how much material you have. Families that cook often and do yard work may produce enough waste to keep a large pile active. Smaller households may only need a compact bin.
Backyard composting works best when you maintain a balance of greens and browns. Greens are nitrogen rich materials such as food scraps, grass clippings, and coffee grounds. Browns are carbon rich materials like dry leaves, cardboard, and straw. Combining the two in layers keeps your compost breaking down efficiently.
The main advantages of backyard composting are that it is simple, scalable, and inexpensive. You can start with nothing more than a pile of leaves and kitchen scraps, or invest in a bin to keep things tidy. The challenge is that it requires some space and a bit of patience. Depending on how often you turn your pile, compost may take three to six months to finish.
Indoor composting solutions
Not everyone has a backyard, especially in urban or suburban areas. Fortunately, composting at home is still possible indoors. Two popular methods are worm bins and bokashi composting.
Worm bins, also known as vermicomposting, use red wiggler worms to break down food scraps. These bins are small, odor free when managed correctly, and can sit in a basement, garage, or even under the kitchen sink. Worm compost, also called castings, is incredibly rich and beneficial for plants.
Bokashi composting is another indoor method. It uses a special inoculated bran to ferment food scraps inside a sealed bucket. Unlike traditional composting, bokashi can handle items like meat and dairy. After fermentation, the material can be buried outdoors or added to a larger compost system to finish breaking down.
Indoor composting methods are great for people in apartments or small homes. They let you recycle food waste without needing outdoor space. The downside is that they require more careful management than a simple outdoor pile.
Compost bins vs open piles
Another choice is whether to use a bin or an open pile. Both can work well, but they have different strengths.
Open piles are the most traditional method. They are easy to start, cost nothing, and can be expanded as needed. The downside is that they can look messy, may attract pests if not managed properly, and take longer to decompose without regular turning.
Compost bins, on the other hand, provide a more contained system. They can be made of wood, plastic, or metal. Some are simple stationary bins, while others are tumblers that rotate easily for mixing. Bins help retain heat, reduce pests, and keep the composting area neat. Tumblers in particular can speed up the process, sometimes producing finished compost in as little as two to three months.
Choosing what works for you
The best composting method is the one you will actually use consistently. If you have a large yard and lots of leaves, an open pile may be the easiest. If you live in a city apartment, a worm bin or bokashi bucket might be perfect. If you prefer a neat, low effort system, a compost tumbler could be worth the investment.
The important thing is to get started. No matter which method you choose, you are reducing waste and creating something valuable. Over time, you may even try more than one system to see what fits your needs best.
What materials can you compost?
One of the most common questions beginners ask is what they can and cannot put in their compost. Getting this right is important, because the balance of materials is what determines whether your pile becomes rich soil or a smelly mess. Think of compost as a recipe. You need the right mix of ingredients for it to work well.
Greens: nitrogen rich materials
Greens provide nitrogen, which is essential for feeding the microbes that break down your compost. They are called greens even if they are not literally green in color. Common examples include food scraps, grass clippings, coffee grounds, and fresh garden waste.
Kitchen scraps are one of the easiest sources of greens. Fruit and vegetable peels, coffee filters, tea bags, and even crushed eggshells go straight into the compost bin. These materials break down quickly and provide energy for the organisms doing the work.
Grass clippings are another excellent nitrogen source, but they should be added in thin layers. A thick mat of grass can create a slimy texture and block airflow. Mixing clippings with dry leaves or cardboard helps maintain balance.
The general rule is that greens are moist, soft, and high in nitrogen. Without enough greens, your pile will decompose slowly.
Browns: carbon rich materials
Browns provide carbon, which is the other half of the composting equation. Carbon rich materials are usually dry, bulky, and brown or tan in color. They include dry leaves, shredded cardboard, straw, paper, sawdust, and small branches.
Leaves are perhaps the best brown material available, and they are free every fall in most parts of the United States. Collecting bags of leaves and storing them for year round composting is a smart strategy. Shredded cardboard and paper are also easy to find and work well, as long as they do not have glossy coatings or heavy ink.
The role of browns is to balance moisture, provide structure, and keep the pile from becoming too wet. Without enough browns, compost tends to smell bad and attract flies.
A healthy compost pile usually needs more browns than greens. A common guideline is two to three parts browns for every one part greens. This ratio does not have to be exact, but aiming for balance helps keep the process smooth.
What not to compost
While many organic materials break down safely, some should be avoided in home composting. Meat, dairy, and oily foods are the most problematic. They decompose slowly, smell bad, and can attract rodents. Pet waste such as dog or cat feces should also be avoided because it may contain harmful pathogens.
Large branches or thick wood chips will eventually break down, but it can take years. If you want to add woody materials, chop them into smaller pieces or use a wood chipper to speed up the process.
Other items to avoid include glossy paper, treated wood, synthetic fabrics, and anything with chemicals. These materials do not belong in organic compost and can contaminate the final product.
Why materials matter
Choosing the right ingredients makes composting simple and effective. Think of it as feeding the tiny organisms inside your pile. Greens give them protein and energy, while browns provide carbohydrates and structure. With both, they thrive and work quickly.
If your compost smells bad, it usually means you added too many greens or too much moisture. The solution is to add more browns and turn the pile to improve airflow. If the pile seems dry and inactive, add water and more greens.
By focusing on the right materials, you set yourself up for success. Over time, you will learn to recognize the balance by sight and smell. With practice, composting becomes second nature, and every banana peel or pile of leaves feels like an opportunity instead of waste.
Setting up your compost bin or pile
Now that you know what materials to use, it is time to set up your compost system. Whether you choose a bin or an open pile, the principles are the same. The goal is to create an environment where microbes and other decomposers can work efficiently to transform waste into dark, crumbly compost.
Location and size
Start by choosing the right location. A good compost pile or bin should be placed on bare soil rather than concrete or asphalt. This allows worms, beetles, and other beneficial organisms to move in and help with decomposition. If placing on soil is not possible, you can use a container with holes in the bottom for drainage and airflow.
The site should have partial shade. Too much direct sun dries out the pile quickly, while too much shade can make it soggy. Somewhere near a water source and your kitchen is convenient, so you do not have to carry scraps far.
As for size, compost piles work best when they are at least three feet wide and three feet tall. This size is large enough to generate heat, which speeds up decomposition, but small enough to turn with a pitchfork. A smaller pile will still compost but may take longer.
Balancing greens and browns
Once you have your spot, it is time to start layering. Begin with a base of browns such as sticks or straw to help with drainage. Then alternate layers of greens and browns as you add materials.
The goal is to keep a balance of nitrogen and carbon. Too many greens create a wet, smelly mess. Too many browns slow down the process. A good habit is to keep a container of shredded cardboard, leaves, or straw nearby. Every time you add food scraps, cover them with a layer of browns. This controls odor and keeps the pile balanced.
Moisture and airflow
Moisture is a key ingredient in composting. The pile should be about as damp as a wrung out sponge. Too dry, and the microbes go dormant. Too wet, and the pile turns anaerobic, which causes bad smells. If your compost is too dry, sprinkle it with water. If it is too wet, add more browns and turn the pile to let excess moisture escape.
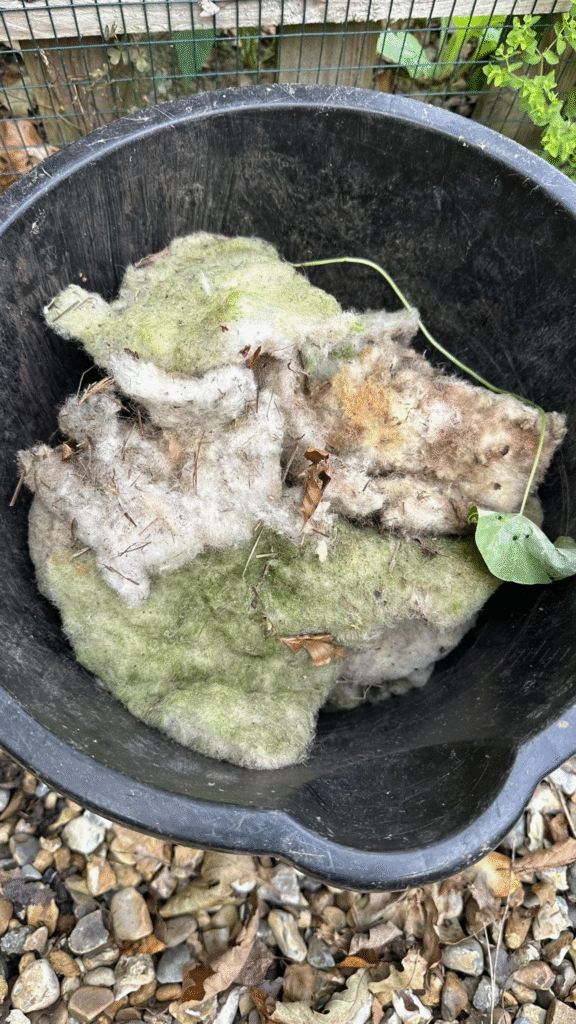
Airflow is just as important. Composting is an aerobic process, meaning it needs oxygen. Without airflow, the pile starts to rot instead of decompose properly. You can maintain airflow by mixing in coarse browns like sticks and by turning the pile regularly. Some bins and tumblers are designed with ventilation holes to make this easier.
Open pile vs bin setup
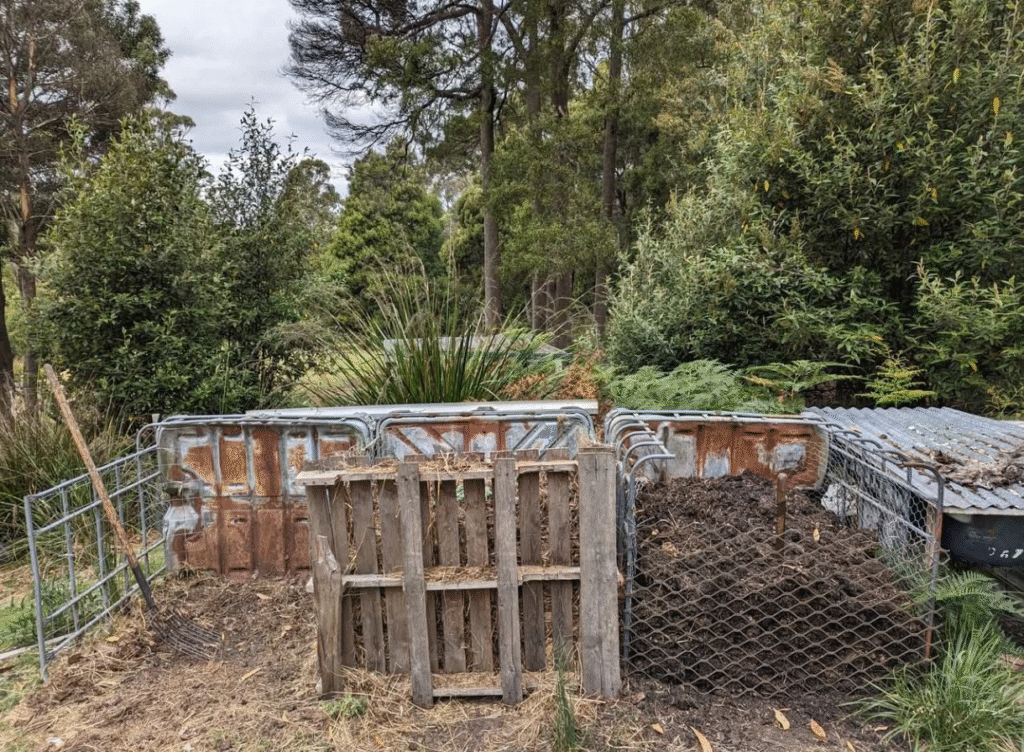
If you are using an open pile, consider building a simple enclosure with pallets or chicken wire. This keeps the pile contained, makes turning easier, and improves airflow. If you choose a bin, make sure it has a lid to keep pests out and holes for ventilation. Tumblers are convenient because they make turning as simple as spinning the container.
The method you choose depends on your space and budget. A backyard with plenty of leaves might be perfect for a simple open pile. A smaller yard or suburban setting may benefit from a tidy bin or tumbler.
Setting up for success
A compost system is like a recipe that gets better with time. If you choose a good location, balance your greens and browns, and pay attention to moisture and airflow, your pile will take care of the rest. Do not stress about being perfect. Composting is forgiving. Even if you forget to turn it or add too many greens, you can adjust and bring it back into balance.
By setting up your compost pile or bin correctly from the start, you make the entire process smoother and faster. This preparation ensures you will soon have rich, dark compost ready to use in your garden.
Maintaining your compost
Setting up a compost pile or bin is only the beginning. To turn food scraps and yard waste into rich, crumbly compost, you need to maintain the system. Thankfully, composting does not require constant work, but it does benefit from regular attention. By learning how to turn your pile, troubleshoot problems, and understand how long composting takes, you can keep the process running smoothly.
Turning the compost pile
Turning is one of the most important tasks in composting. When you mix the pile, you introduce oxygen that microbes need to keep breaking down materials. Without enough air, the pile can go anaerobic, which slows decomposition and causes unpleasant smells.
For an open pile, use a garden fork or shovel to flip the outer materials toward the center and the inner materials outward. This helps ensure everything decomposes evenly. If you are using a compost tumbler, simply spin it a few times every week to mix the contents.
The frequency of turning depends on how fast you want results. Turning once a week usually creates finished compost in about three to four months. If you turn less often, it may take six months or more, but the compost will still finish eventually.
Troubleshooting common problems
Sometimes compost does not go as planned, but most issues have simple fixes.
If your compost smells bad, it likely has too many greens or too much moisture. The solution is to add more browns like dry leaves, shredded cardboard, or straw, and to turn the pile to improve airflow. A healthy compost pile should smell earthy, not rotten.
If the pile is not heating up or breaking down, it may lack nitrogen. Adding more greens such as food scraps, grass clippings, or coffee grounds usually solves the problem. Moisture also plays a role. If the pile is too dry, sprinkle it with water until it feels like a wrung out sponge.
If pests such as rodents or raccoons are a problem, make sure you are not adding meat, dairy, or oily foods. These attract animals and do not compost well in small home systems. Keeping your pile covered with a lid or a layer of browns also discourages pests.
Insects like flies may appear, especially if food scraps are exposed. The fix is simple: bury kitchen scraps in the middle of the pile and always cover them with browns. This creates balance and eliminates odor that attracts bugs.
How long composting takes
The time it takes to create finished compost depends on your method and effort. A hot pile that is turned regularly and has a good balance of greens and browns can produce usable compost in as little as two to three months. A slower, cooler pile may take six months to a year.
Indoor methods like worm bins work on a different timeline. Vermicompost often takes about three to six months, depending on the number of worms and the size of the bin. Bokashi composting is faster, fermenting food in just a few weeks, but it still requires a final stage of burying or mixing into soil before it is ready.
The key is patience. Composting is not instant, but it always works. Whether fast or slow, the end result is the same: a dark, crumbly material that enriches your soil.
Why maintenance matters
Regular maintenance is the difference between a thriving compost system and a smelly pile of waste. By turning, balancing, and adjusting as needed, you guide the natural process toward success. Composting is not about perfection. Even if things go wrong, you can almost always fix them by adjusting greens, browns, moisture, or airflow.
Maintaining your compost also helps you feel more connected to the process. Instead of throwing waste away and forgetting about it, you take part in its transformation. This small act of stewardship builds confidence and shows how easy it is to live more sustainably.
How to know when compost is ready
One of the most satisfying moments in composting is when your pile finally turns into dark, crumbly compost. For beginners, it can be hard to tell when the process is complete. Finished compost should no longer look like the scraps you put in. Instead, it should resemble rich soil with a pleasant earthy smell.
The easiest way to check is by sight and touch. If you can still identify chunks of food or leaves, it needs more time. Finished compost is uniform, dark brown to black in color, and has a soft, crumbly texture. It should not be slimy or smell bad. If it does, that means there is still decomposition happening.
Temperature is another clue. An active compost pile generates heat as microbes break down material. Once it cools down and stays cool for several days, it is usually close to being finished. You can test this by turning the pile and checking if it heats back up. If it does not, most of the breakdown is complete.
A final check is the seed test. Place some compost in a pot and plant fast growing seeds like radish or lettuce. If they sprout quickly and look healthy, your compost is safe and ready to use. If growth is poor or uneven, let the compost rest longer.
How to use compost in the garden
Once you have finished compost, you can use it in several ways to improve your soil and plants.

Mixing into garden beds
Before planting vegetables or flowers, mix compost into the top six inches of soil. This boosts fertility, improves water retention, and helps roots establish quickly. Many gardeners add compost at the start of each growing season to refresh the soil.
Top dressing for existing plants
Compost can be spread around the base of trees, shrubs, or perennials as a natural mulch. This slowly releases nutrients into the soil while helping retain moisture. It also suppresses weeds when applied in a thick layer.
Starting seeds and seedlings
You can mix compost with sand or potting soil to create a nutrient rich medium for seedlings. Use caution with 100 percent compost for delicate seedlings, as it may be too strong. Blending it with lighter soil ensures good drainage and healthy growth.
Lawn improvement
A thin layer of compost spread across your lawn acts as a natural fertilizer. It helps grass grow thicker, reduces the need for chemical treatments, and supports beneficial soil organisms.
Container gardening
For those growing in pots or raised beds, compost is invaluable. Mix it with potting soil to create a balanced, nutrient rich blend that supports container plants. This is especially useful for urban gardeners with limited space.
Why using compost matters
The value of homemade compost is more than just saving money on fertilizer. Unlike synthetic products, compost improves soil health in multiple ways. It feeds plants, supports beneficial microbes, and helps the soil store water and nutrients. Over time, gardens with regular compost additions become more fertile, resilient, and productive.
Using compost also closes the loop at home. The food scraps and yard waste you once threw away come back to nourish your soil. This cycle reduces waste, lowers your environmental footprint, and builds a more sustainable lifestyle.
Whether you grow vegetables, maintain a lawn, or keep houseplants, compost is one of the best tools you can use. It transforms ordinary gardens into thriving ecosystems and connects you directly to the cycles of nature.
Step by step composting plan for beginners
Starting composting may feel overwhelming at first, but breaking it into simple steps makes the process easier to follow. This beginner’s plan outlines what to do during your first few months so you can successfully make your own compost at home.
Week 1: setting up your bin or pile
Choose your composting method. If you have outdoor space, set up a pile or bin in a convenient location on soil with partial shade. If you live in an apartment, consider a worm bin or bokashi bucket.
Gather your starter materials. Collect a pile of browns like dry leaves, shredded cardboard, or straw, and keep a small container in your kitchen for collecting greens such as fruit peels, vegetable scraps, and coffee grounds.
Start your compost by laying down a base of browns, followed by a layer of greens, and cover with more browns. This layering method helps balance the pile and prevents odors.
Month 1: adding materials and monitoring
Throughout the first month, continue adding kitchen scraps and garden waste. Always cover fresh food scraps with browns to discourage pests and flies. Check moisture by squeezing a handful of compost. It should feel like a wrung out sponge. Add water if it is too dry, or browns if it feels soggy.
Turn the pile every week or two to mix materials and add oxygen. If you are using a tumbler, give it a spin a few times each week. This activity keeps microbes active and speeds up decomposition.
Month 2 to 3: turning and balancing
By the second month, your pile should start heating up and breaking down. Continue turning regularly and monitoring the balance of greens and browns. If the pile smells unpleasant, add more browns. If it looks dry and inactive, add more greens or sprinkle with water.
At this stage, you may notice that your pile shrinks. This is normal and shows that materials are decomposing. You can keep adding scraps, but always cover them well and turn the pile so everything decomposes evenly.
For worm bins or bokashi systems, monitor closely and adjust as needed. Worms need bedding and balanced feeding, while bokashi requires draining excess liquid.
Month 4 and beyond: harvesting and using compost
By the fourth month, you should start seeing dark, crumbly compost at the bottom or center of the pile. Test it by smell and touch. If it looks like rich soil and smells earthy, it is ready.
Sift the compost if you want a fine texture, setting aside any large undecomposed pieces to add back into a new pile. Use the finished compost in your garden beds, lawn, or containers as a natural fertilizer.
Continue the cycle by adding new scraps and yard waste to the pile. Over time, composting becomes a habit. You will find yourself naturally saving scraps, adjusting balance, and harvesting compost several times a year.
Why this step by step plan works
This plan is designed for beginners who want results without confusion. It guides you through setup, early monitoring, active maintenance, and harvesting. By following it, you learn the basics while gaining confidence to experiment with different methods.
Remember, composting is not about perfection. Even if you forget to turn your pile for a few weeks, nature will still do the work. By sticking with the process, you will always end up with something valuable for your soil.
FAQ
Can you compost in small spaces or apartments?
Yes. Even if you do not have a backyard, you can compost indoors. Worm bins and bokashi buckets are compact, odor free when managed correctly, and work well in apartments. You can also use countertop composters that dehydrate scraps for later use in soil.
Do you need worms for composting?
Not always. Worms are a great help in vermicomposting systems, but outdoor piles and bins rely on microbes and natural decomposers already present in the soil. Worms will often find their way into an outdoor pile on their own once it is established.
How do you keep pests away from compost?
The key is balance and covering your scraps. Always bury food waste under a layer of browns such as leaves or cardboard. Avoid composting meat, dairy, and oily foods, which attract rodents. Using a secure bin with a lid also keeps pests out.
What is the fastest way to make compost?
A hot compost pile breaks down materials the fastest. To achieve this, create a pile at least three feet wide and tall, maintain the right balance of greens and browns, and turn it every few days. With this method, compost can be ready in as little as six to eight weeks.
Is homemade compost better than store bought compost?
Homemade compost is usually richer and more diverse in nutrients than store bought compost. It also supports more beneficial microbes because it is fresh and alive. Store bought compost can be convenient, but making your own saves money, reduces waste, and allows you to control what goes into it.
Our Final thoughts
Learning how to make your own compost at home is one of the most empowering steps toward sustainable living. It transforms everyday waste into a valuable resource that improves your garden, saves you money, and reduces your environmental impact.
For beginners, the process may seem complicated at first, but composting is forgiving. Even if your pile is too wet, too dry, or unbalanced, simple adjustments will bring it back on track. Nature wants to recycle organic matter, and by giving it the right conditions, you are simply speeding up what would happen naturally.
The benefits go beyond the garden. Composting teaches you to see waste differently, to value resources, and to participate in a cycle that connects you directly to the soil. Every peel, coffee ground, and leaf becomes part of something larger that supports growth and life.
Whether you live on a homestead, in a suburban home, or in an apartment, there is a composting method that fits your space. You do not need special tools or large amounts of time. What matters is starting and letting the habit grow.
By following this complete homemade compost guide, you now have the knowledge to set up your own system, maintain it, and use the results in your garden. With patience and consistency, you will soon be harvesting dark, crumbly compost that enriches your soil and supports healthy plants.
Making compost is not just about producing fertilizer. It is about creating a cycle of sustainability right at home, reducing your footprint, and building a healthier future. The best time to start is today, with whatever scraps you have on hand. In a few months, you will see firsthand how simple actions can turn waste into abundance.
Keywords
- How to make your own compost at home
- Composting for beginners
- Homemade compost guide
- DIY compost at home
- Step by step composting
- Compost bin setup
- Backyard composting
- Indoor composting
- What not to compost
- Composting kitchen scraps
- Turning compost pile
- Finished compost signs
- Organic compost tips
">Discover Homesteading
Send an email
3 Comments